A natural smile looks simple. It is not. Behind each photo you see in a cosmetic case is careful planning, clear records, and honest communication. You want teeth that fit your face, your age, and your personality. You do not want a fake, flat, copy‑and‑paste smile. Careful photos help your dentist design results that match you. They also help you see options before any work starts. Many patients feel nervous about cosmetic treatment. Strong photos reduce that fear. You see problems clearly. You see what can change and what must stay the same. You can point to what you like and what you do not like. This guide shares six simple photo tips that give you control, protect your investment, and help you and your dentist aim for natural-looking cosmetic results.
Why photos matter for cosmetic planning
Photos tell the truth in a way a mirror cannot. You see your smile from the front and the side. You see it while you talk and while you rest. Your dentist studies these views and compares them with your goals.
The National Institute of Dental and Craniofacial Research explains that records like photos and models support better long-term oral health planning.
Use the six tips below before a cosmetic visit. Bring the photos on your phone or print them. Then talk through each one with your dentist.
Tip 1. Take clear front photos of your relaxed smile
First, capture how you look every day. Not your “photo smile.” Just your normal face.
- Sit or stand straight in front of a plain background
- Look at the camera with your lips at rest
- Take one photo with lips closed and one with a light smile
These photos show how teeth support your lips and cheeks. They also show if your teeth look too short, too long, or tilted. Your dentist uses this view to choose the tooth length and shape that match your face.
Tip 2. Capture a full, natural laugh
Next, ask someone you trust to make you laugh. Have them hold the camera straight and ready.
- Use video or burst mode while you laugh
- Pick two frames that show your widest smile
- Make sure the photo includes your chin, nose, and both cheeks
This laugh view shows how much gum shows, how wide your smile is, and how your back teeth look. It helps your dentist avoid a stiff or square look. The goal is a smile that still feels like you when you laugh with family or at work.
Tip 3. Take side views from both right and left
Your profile affects how your teeth should look. A side photo shows the balance between nose, lips, and chin.
- Stand sideways in front of the same plain background
- Take one photo with lips at rest
- Take one with a gentle smile that shows your front teeth
These views guide choices about how far forward or back your front teeth should be. They also help your dentist avoid teeth that look too “pushed out” or “tucked in.”
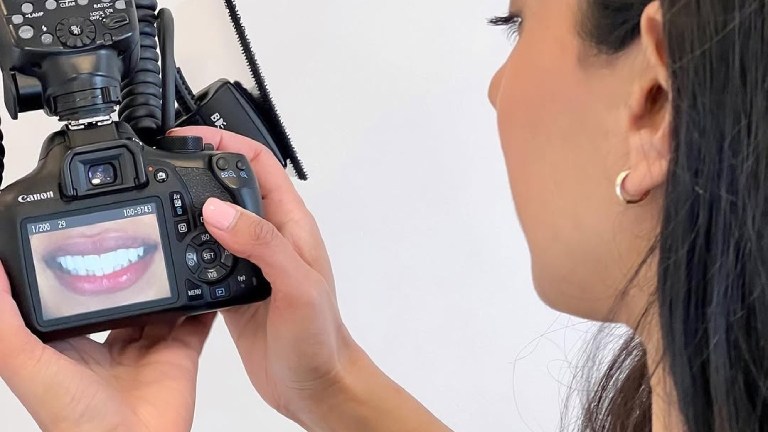
Tip 4. Use close-up shots of your teeth only
Now move closer. You can use your phone in selfie mode or ask someone to help.
- Gently pull your lips away from your teeth with clean fingers
- Take a close photo of the upper and lower teeth together
- Take one with your teeth slightly apart so the edges are clear
These photos show chips, wear, and old fillings. Your dentist studies them to match shapes, close spaces, and fix crowding or rotations. They also help match the color from one tooth to another.
Tip 5. Match the lighting so the tooth color looks real
Light changes tooth color in photos. Harsh light makes teeth look flat. Dim light makes them look dark.
- Stand near a window with daylight
- Turn off strong overhead lights if they cause glare
- Clean your camera lens before each set of photos
Consistent light gives a true view of your tooth shade. That helps your dentist choose the right color for fillings, crowns, or veneers so they blend. The Centers for Disease Control and Prevention notes that early color changes can also signal enamel problems or decay.
Tip 6. Organize your photo set for your dentist
Finally, put the photos in a simple order. That saves time during your visit and keeps the talk focused on your goals.
- Create one album on your phone named “Smile photos.”
- Add 2 relaxed front photos, 2 laugh photos, 4 side photos, and 2 close-ups
- Delete blurry or dark shots so only clear images remain
Then write a short note on your phone. List three things you like about your smile and three things you want to change. Use simple words. For example, “too dark” or “edge chipped.” Share this list while you and your dentist review the photos together.
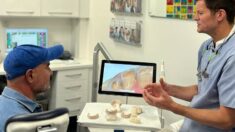
How to use your photos during the visit
During your appointment, ask your dentist to pull your photos up on a screen. Then walk through three steps. A Buford dentist will use these photos to guide shape, color, and symmetry.
- Point to what you like in each photo
- Point to what upsets you or feels “not like you.”
- Ask how each treatment option would change those spots
That clear talk prevents regret and supports results that match your story, not a stock image. Your photos become a shared map that guides each step.