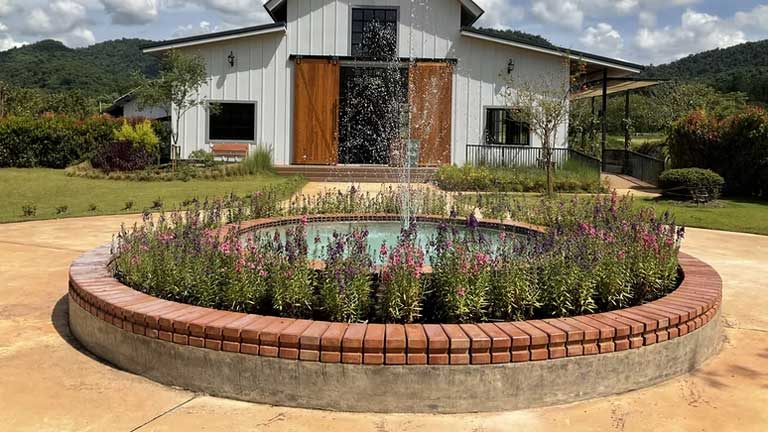
A garden fountain is a great way to not only create a relaxing soundtrack for your back garden but can also give you that professional, straight-from-a-magazine look. It’s not too difficult or expensive to create a garden fountain if you make it your own.
You can create stone fountains using anything from a pot to a large rock. You can use the outer structure and water pump to make the water feature. Most people use a pot as the central basin, while others opt for a poured concrete base. You can make a beautiful fountain at the weekend.
Below, you’ll find three different models, all affordable and easy to make in just a few hours following the steps. Once you’ve done this, you’ll be amazed at how beautiful it looks!
Method 1
Ball Fountain
1. Create your foundation
Choose a 5-gallon (18.9 L) cylindrical bucket and make an opening to accommodate an inch of PVC pipe on the bottom. Turn the bucket upside-down and insert a 24-“ PVC pipe through the hole, leaving around 6” of room in the middle. Apply caulk or silicone to fill any gaps. Put the structure on top of a large piece of plywood. Then, place a 12″ vast concrete forming a tube in the bucket. This is the form you will use for the base. It’s going to be filled with concrete that has been set quickly. Fill it until the bucket is filled with a minimum of 2″ of material. After that, give the bucket a shake to eliminate bubbles. Set it according to the instructions of the manufacturer.
2. Make the ball
Find the glass light fixture, spray it with cooking spray, and fill it up to its top with concrete. Cut off the ends of the PVC tube and then push the taped end into the middle of the ball to ensure that it rests comfortably in the glass. Place the tape in place until the concrete is set.
3. Cut the form pieces
Take both parts of their molds and use an adjustable saw to cut off the excess PVC pipe.
4. Make the basin
Dig a small hole enough to fit the plastic garden basin. Fill it with river stones and set the 100 to 155 gallon (586.7 L)-per-hour pump in the stone and then over the pump with stones.
5. Inject the tubing
Then, run the 1/2″ plastic tubing through the pumps with the base tipped onto its side upwards into the pipe made of PVC. Place the flour on top and then slide the tubing into the ball.
6. Cut the tubing, and then secure the ball
Cut off any excess tubing sticking out of the ball. Then, remove the ball to reduce the tube until it fits beneath the ball’s lip. Restore the ball to its original place and anchor it to the ground using some adhesive silicon.
7. Pour in water, and then turn off the pump
Fill your basin with water and then turn on the pump. Ta-da! Your garden fountain is done!
Method 2
Flower Planter Fountain
1. Create your base
Find a large flowerpot and drill a hole using ceramic bits and a drill for the power cord to pass through. Use silicone or Sugru to fill the gap after giving the line. Cover the entire inside with water sealant to shield the pot.
2. Cut the tube and connect it
You’ll need a 1/2″ rubber tube that is cut to 1’ or higher than your
3. Place the next pot in
You’ll need another planter for flowers, but this time, a little smaller. It will require an opening that is about equal to the diameter of its base previous and should extend to around 1/3 of the way up the pot that you used. Make use of a file to make small creases in the pot’s bottom, and make a hole in the bottom’s centre sufficient to allow a 1/2″ rubber tubing through. Then, place the jar inside the second, upside down, and pull the tube into the crack as you move.
4. Continue placing pots
Put another pool in the middle, with the upside-down one as the base. Continue placing banks in this way until you have three pools nested. Be sure to consider the hole that will allow the tubing to go through and notches along the rims of your two upside-down pots.
5. Incorporate the water and switch on your pump
Ta-da! Your garden fountain is done!
Method 3
Watering Can Fountain
1. Make sure you have the right items
You’ll need a snare with a downspout, a water bottle, and a massive tub made of metal. You’ll require pumps and 1 1/2″ tubing, a wood wedge, something to cut or puncture the metal with, and silicone or Sugru.
2. Make the base
Make a 12″ hole into the outside of the tub, and then insert the tubing in it. Connect the tubing to the pump and close the hole using Sugru or silicon until it’s watertight.
The punctured hole must be located close to the bottom of the tub.
3. Make the connection
Make a similar” hole into the pail’s side and thread the tube’s end through it, so you insert the line into the bucket. Seal the hole the same way you seal the tub.
4. Set up your containers
Place the containers on ledges, steps, or boxes so that the downspout from the pail can flow into the watering container, and the watering container pours into the bath. The watering container will require the wedge under it to pour it out.
5. Incorporate the water, then turn on the pump
Ta-da! Your garden fountains are done! Add as many watering containers as you like on the chain.
Final Words:
If you’re looking for something to make an impressive style statement, you can’t go wrong with a fountain you make yourself. It’s striking enough that it’s the first thing that visitors to your garden will notice. You can dress fountains with lovely blooms and floating baubles to create added appeal. In case, visit the professional cast stone manufacturers and pick the best stone design you require to construct your fountain. It’s a great feeling to create something unique using your own hands. Your neighbors and friends will ask you what you did to make something so amazing!